There are 80 nine-patch units (3.5″ unfinished size) in the Bright Sisters quilt. I used a traditional strip-piecing method to create them:


The strips (and most of the units and pieces photographed here) are lying on my beloved Magic Pressing Mat. It’s a compressed felt mat that sits on my ironing board and gives me a firm, flat surface for pressing seams. Mine is 12″ x 18″. I really recommend it.

I have always had a terrible time getting an accurate 1/4″ seam. Since this quilt has so many horizontal and vertical seams, I knew that if I didn’t get this right, the quilt would be all wonky and wouldn’t be properly flat. I looked up advice on how to get accurate seams (there’s lots… take your pick) and in the end I put together a set of tools to help.
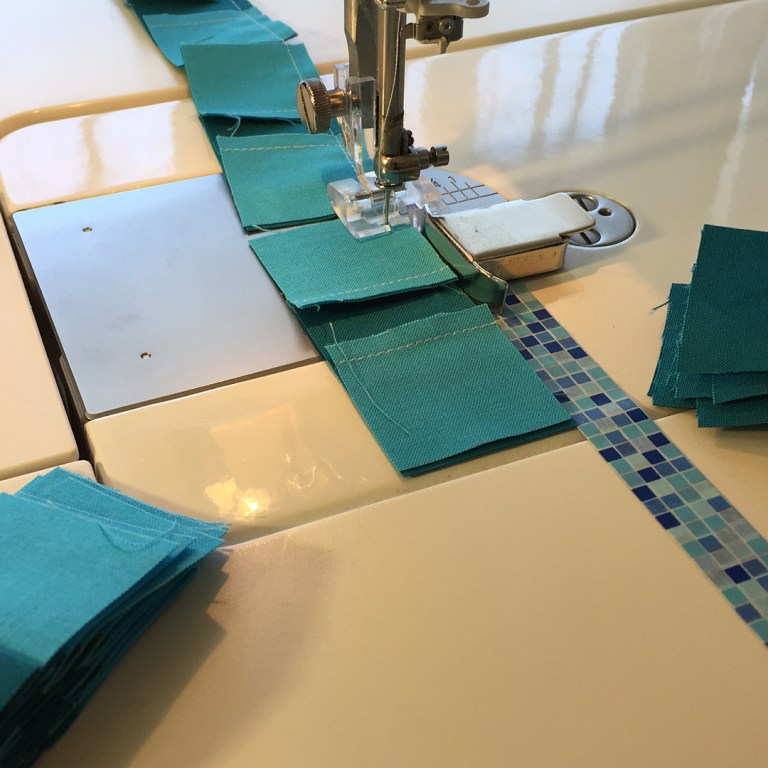
Since I know I’ll need to switch feet for this quilt, I want a way to make sure that I’m getting the same seam with each foot even if I swap them in and out. In the picture above, I’m using a Dritz magnetic seam guide placed right on the machine. You can also see some blue checkered washi tape that I’ve lined up to give me a nice long straight edge for guiding those strips. I used the Perfect Piecing Seam Guide to figure out where to place both the seam guide and the washi tape. I love using the seam guide because it means that everything will be back in the right place when I change feet.
I’m also using the Curve Master presser foot in this picture because it has a 1/4″ fabric guide that can be used for straight seams as well as curved ones. I’m not accurate enough to just use that, which is why I’ve got the seam guide and washi tape too.
The other foot that I use doesn’t have a 1/4″ guide at all, but it’s better for sewing across the middle of a fabric square (like for the half-square triangles) when you can’t line up the fabric edges with the edge of the foot. In the end I found that I got a better seam if I used the regular foot plus the metal guide/washi tape for straight seams, and reserved the Curve Master for the curved seams on the drunkard’s path units. More on that later.
I also found the Craftsy class Quilt Faster: Accurate, Streamlined Piecing by Lee Chappell Monroe to be really helpful. It’s full of great tips and it’s where I got the washi tape idea.


See the washi tape on the ruler? That’s from Lee Chappell Monroe’s class too. Another great tip.


This is another tip from Lee Chappell Monroe’s class and boy does it save a lot of time!


The nine-patches went pretty fast once I solved my 1/4″ seam problem. It’s such a pleasure to work with units that are the right size!
The previous post in this series was Bright Sisters: Cutting the First Fabrics. Next time, I make those curved Drunkard’s Path units!
2 Comments Add yours